How to Screen Record on a Chromebook (2026 Guide)
You can screen record on a Chromebook with the built-in Screen capture tool, no extension needed. Press Shift + Ctrl + the Overview key (the window-switch key above 6), or open Quick Settings and choose Screen capture. Switch to the video camera icon, pick full screen, a region, or a window, and start. Recordings save to your Downloads folder as a .webm file. Full steps are below, including how to record with audio, how to stop, where recordings go, and how to record on a school Chromebook.
This video was made with Velo. No editing, no retakes.
Try it freeHow to screen record on a Chromebook
- Press Shift + Ctrl + Overview (the window-switch key in the top row, above the 6), or click the clock to open Quick Settings, then choose Screen capture.
- In the toolbar at the bottom, select the video camera icon to switch from screenshot to screen recording.
- Choose record full screen, record a partial region, or record a single window.
- Click to start. A timer shows while you record.
- To stop, click the red stop icon in the status area at the bottom-right.
This is the same method whether you want to record your screen, record video of a window, or capture the whole display.
How to screen record on a Chromebook with audio
Before you start, click the Settings gear in the Screen capture toolbar. Turn on Microphone to record your narration, and turn on Device audio if you want to capture sound playing from the Chromebook itself. You can also turn on the front camera to add a webcam bubble. Set these before recording, since they cannot be added afterward. This is how you screen record with audio and with sound in the same clip.
How to stop or end a screen recording on a Chromebook
Click the red stop icon in the status area at the bottom-right of the shelf. The recording ends immediately and a notification shows the saved file, so you can end a screen record without any keyboard shortcut.
Where do Chromebook screen recordings save?
Recordings save automatically to your Downloads folder and open from the Files app. The format is .webm, which plays in Chrome and most editors. You can also find the newest recording in the Tote shelf at the bottom of the screen right after you stop.
How to screen record on a school Chromebook
On a managed school or work Chromebook, an administrator can disable Screen capture. If the tool does not appear or the recording button is greyed out, your device is managed and recording is turned off by policy. Ask your admin to enable it. The steps are otherwise identical on an HP, Acer, Lenovo, or ASUS Chromebook, since screen recording is part of ChromeOS rather than the hardware.
How to turn a Chromebook recording into a video worth sharing
A raw screen recording is fine for a quick clip, but it is often long, unpolished, and hard to follow. When you need to share it as a tutorial, a demo, or a training video, this is where Velo comes in:
- Upload the .webm recording to Velo.
- Velo writes a fresh script and rebuilds it into a polished, narrated video that is trimmed, with auto-zoom on what matters.
- Need a change? Fix the script and regenerate. No re-recording.
- One click turns the same recording into a written doc for your help center or notes.
You record once. Velo makes it worth sending.
Why is my Chromebook screen recording not working?
- There is no record option, or it is greyed out. A managed school or work Chromebook can have Screen capture turned off by an administrator. Ask your admin to enable it.
- There is no sound in the recording. ChromeOS does not capture audio by default. Open the Settings gear in the toolbar and turn on Microphone and Device audio before you start.
- The recording will not stop. Click the red stop icon in the status area at the bottom right, or press Search + Shift + X.
- You cannot find the file. Recordings save to Downloads as a .webm file. Open the Files app, or click the Tote shelf at the bottom right right after you stop.
- The .webm will not upload somewhere. It plays in Chrome natively; if another tool rejects it, convert it to MP4 first.
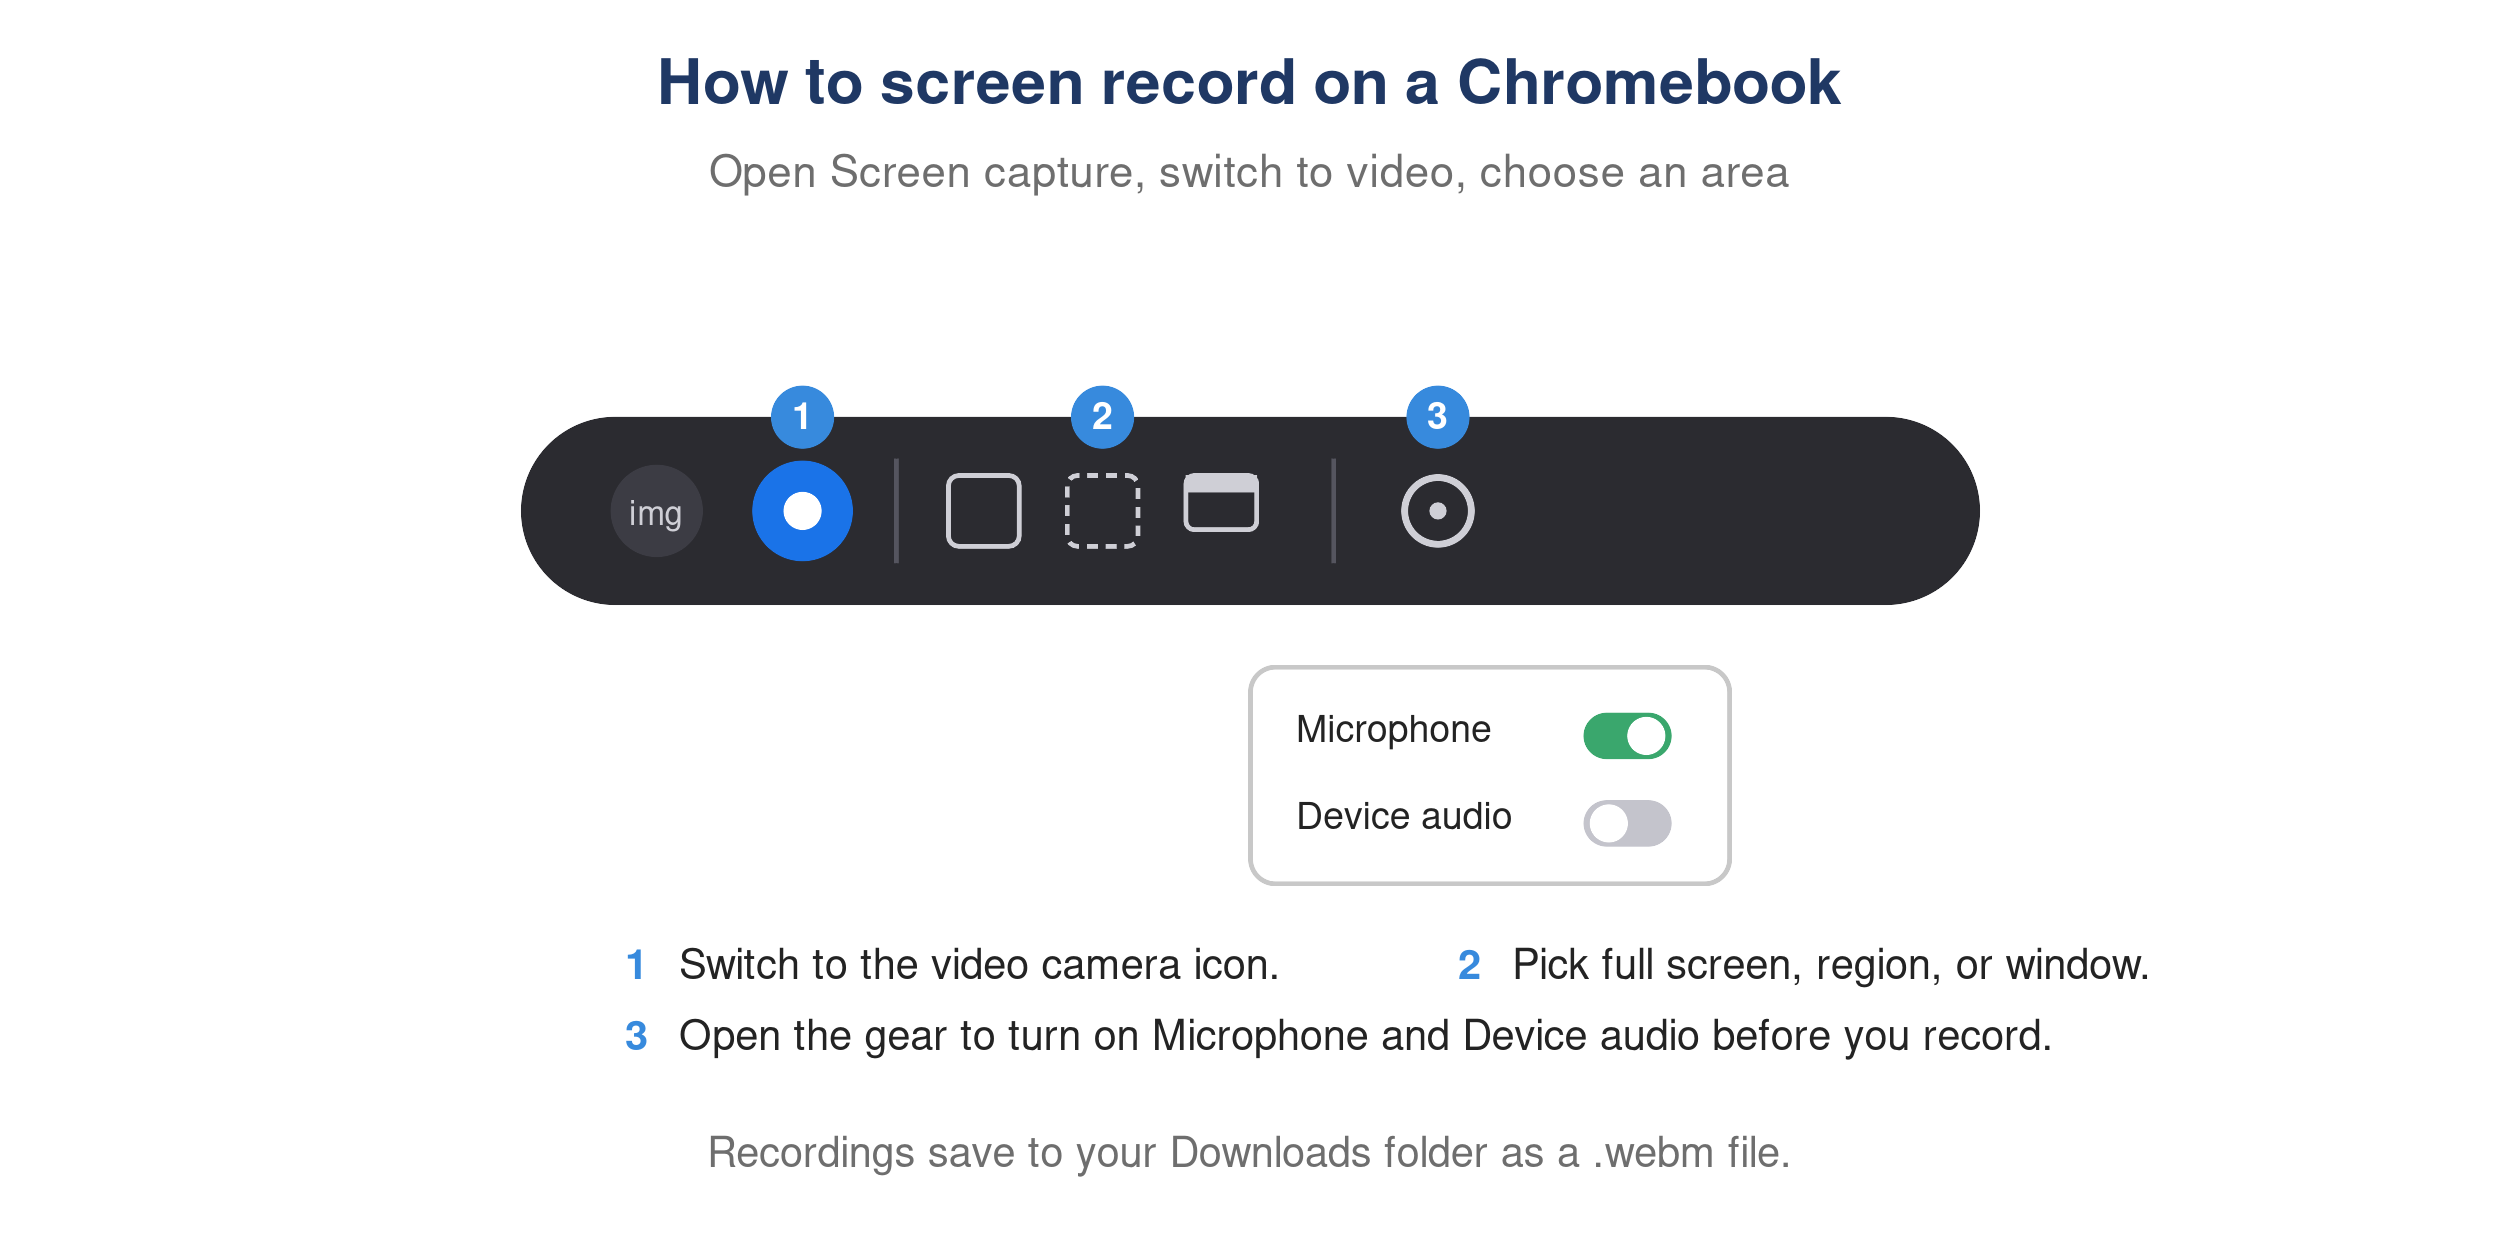
The ChromeOS screen capture toolbar showing the record button, capture-area options, and audio settings.